Showing posts with label diy. Show all posts

Sunday, February 17, 2013

Red Chevron

Here's another dresser I just recently refinished. If you'd like the tutorial its the same as HERE.

I love these knobs!!!
 Close up of one of the drawers...


I liked the added touch of the sides of the drawers being painted.
Which one do you like better?

Sunday, January 13, 2013

Homemade Laundry Detergent

So last year I decided I wanted to try making my own laundry detergent. I tried a recipe I found on Pinterest HERE.
But I tweaked it a bit and I like it so much more. 
Here's what you'll need...
(Sorry I forgot to take the pic until after I made the batch)

*1 large box of Baking soda (4lb)
*1 large box of washing soda (3lb 7oz)
*1 large box of Borax (4lb 12oz)
*1-2 containers of Unstopables (I like mine SUPER fragrant so I use 2, but I think for most people 1 would be plenty)
*1 small jar of Fruit Fresh (5oz) ( I have hard water so this helps with the build up on my clothes)
*1 bar of Fels-Naptha (finely grated, I like to use my food processor)
*(not pictured) 4oz of Oxyclean (I sometimes use the store brand cleaner to keep cost low; but this time I got the real stuff on sale at Costco)

You just dump it all in a garbage bag (double bagged); and then mix it up and you're done. Its super quick and has lasted me about a year. If you want it to look prettier you can do what I do and get a jar from Walmart for about $10. Then I just keep the big bag hidden until I need to refill the jar. 
Here's what it looks like when you're all done...
I use 1-2 T per load, or just a small scoop out of the store brand Oxyclean at walmart. When its kiddos clothes I do an extra scoop of Oxyclean. It has worked so great and I think it cleans as well as any store bought detergent. I can't find my receipt  but I think it was between $30-$35 for a whole year's worth of detergent (depending on how much Unstopables and the kind of Oxyclean). I feel pretty good about that!

Try it out and let me know what you think! I'd love any questions or feedback anyone has.
HAPPY WASHING! :)

Sunday, January 6, 2013

DIY Chevron Dresser

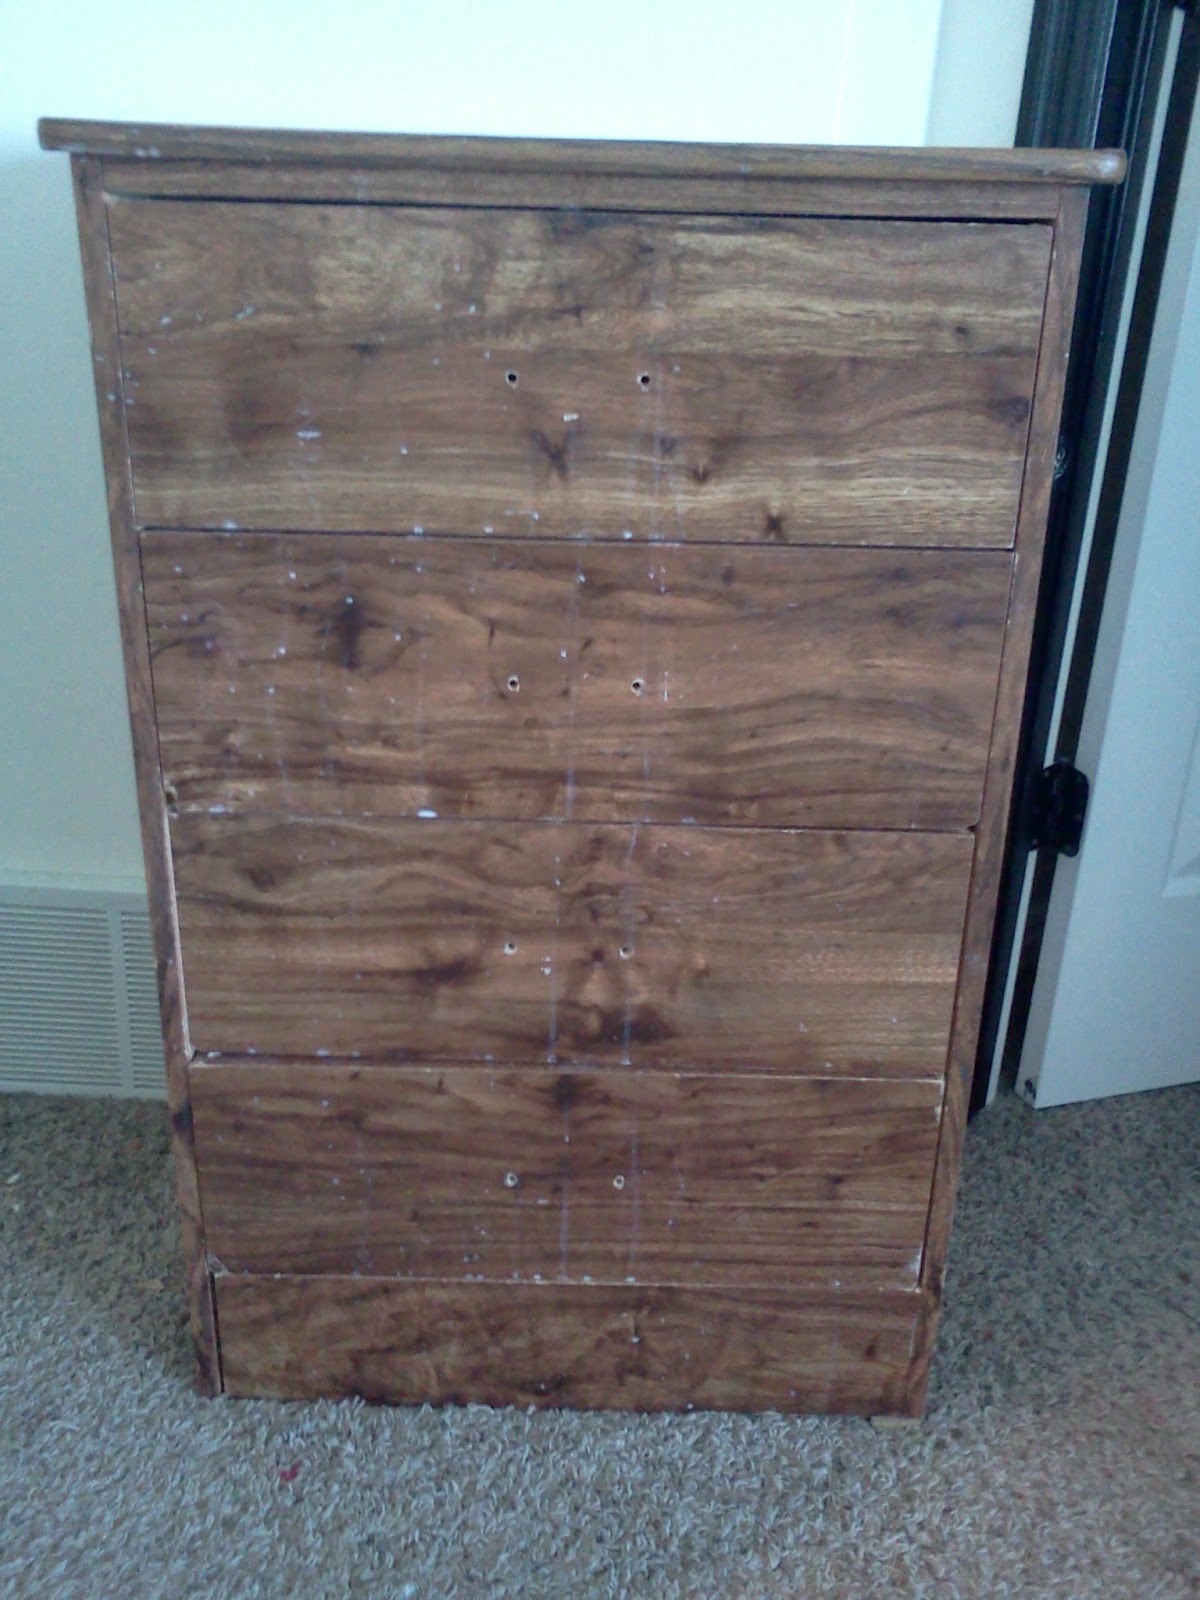
So a neighbor of mine had this little beauty out on the street with a free sign on it, and with me being me ...I saw the amazing potential and had to have it.  I talked the hubby into dragging it home in the dead of the night...cause that's how we roll.

 So after I gave this baby a good scrub down; my first step was to put a little black paint on the parts of the dresser where I wanted it to show through.

Here's what the drawers looked like...

Next step is to add some Petroleum Jelly on top of the black. Now I realized through trial and error that less is more; though I did like that in a few spots big chunks came off.  
Then I mixed up some Chalk paint to put over the top. I've found that it works great over laminate (no sanding necessary!) Yahoo!
Here's the link to the recipe I used...

Then I taped off the drawer fronts and the top. Now the easiest way to do this is to actually cut the painter's tape with scissors. Then it gives you that clean cut to make straight stripes. 
Then I measured out the middle of the drawers and made that where my "bump down" was going to happen. 
For the top I made a few straight lines with the tape to measure out the different rows...I used an egg carton; because that was about the width that I liked. Then I kinda eye balled it from there where I wanted the points to go.
Last but not least I did two coats of my black paint...waited until it was mostly dry ('cause I can never wait any longer then that) and then ripped off the tape.
At this point you will want to take a rag and pat/wipe the areas where there was the Petroleum Jelly to reveal your darker color. Patting will only show the "under color" a little and wiping it will make it show a lot.

Then you just top with a wax finish or polyurethane and....
BOOM GOES THE DYNAMITE.... 
You have a ridiculously awesome new dresser!
Here's the top view...

Here's the amazing knobs...they're from Hobby Lobby, and I spray painted them sunshine yellow.
One more shot of the whole thing.
 What do you think? I really like the weathered look, and I love that I didn't need to "touch up" the lines because it kinda just goes with the whole look.

Tuesday, November 27, 2012

Super Hero Dresser

So I found this little beauty on an online yard sale site in my area...paid a whopping $30 for it... Gorgeous right?
Sorry I had already taken out the drawers by the time I snapped the pic.... but it's got a cool Hulk thing going on...am I right?!? 
....Anyway....after a little de-glosser I spray painted the sides and the doors tourquoise. I love this color it is freaking awesome! :)
Then I painted the rest with two coats of black paint and 2 coats of poly and voila!....

Sorry about the glare...it is so stinking shiny I can't get a good angle...
All of the knobs are hand painted by yours truly and they look freaking amazing if I say so myself...
There is a Batman, Hulk, Captain America, Ironman, Spiderman, and Thing (from Fantastic 4). They are all my son's favorites. I ended up taking the doors off for better access and I think I'll be using them for something crafty in the future....So here is how it sits right now in the little man's room...
Yes....there is hardly any clothes...I hate doing laundry...don't judge.
For the shelves I just used my friendly neighborhood Modge Podge and stuck some gorgeous Marvel fabric on that baby that I had lying around... I think all in all its pretty rockin', and the little man loves it!

Tuesday, February 28, 2012

A peek at what we've been up to...

Jim starting on our big make over of my craft room...

Now he's hiding from the camera so i can get the whole closet...
Hopefully soon I will have some after pictures of my brand new closet! :)

Friday, August 26, 2011

Jewelry Dress Form Re-do

Alright I have to admit that I am SUPER EXCITED to share this post today! I have this little beauty for a year or two now... (Got it for $0.50 at a yard sale... BooYah!)
Now just some paint, tulle, trim and an amazing antique earring and...
 AMAZING-NESS!!
 Here's a close up of the super cute belt/jewel! I LOVE IT! It's totally going in my salon & boutique we're putting in next weekend! Can't wait!
P.s. If anyone is interested in the step-by-step pics i can post those too! 
Now let me know what you all think!